


Customize your ATAK – Tutorial from Professional ATAK Instructors
ATAK is a malleable system that allows the user to customize a zoo of aspects and not just maps and callsigns. It takes some time using the system to know where to alter some of the attributes to the default tools, icons, viewing experience and plug-ins. Most of the customizing will work through the “Settings” tool. Some tools, like “Routes” Tool will hot key the user to customize the settings. Nearly every tool has customizations that the user can make, we will go over customizing the Toolbar.
Customize the Mission Focused Toolbar
The Toolbar should be the place where you locate all of the users more frequently utilized plug-ins or tools. There are two ways to customize the Toolbar: mission focused and user focused. The purpose of the mission focused Toolbar is to create a common Toolbar for an entire team. For example, if the team using ATAK is an Urban Search and Rescue team they will need to quickly access a few tools like Contacts, UAS Tool Kit, Maps, Overlay Manager, Point Dropper and Digital Pointer. The ATAK lead or Team Leader can create this Toolbar and share it with their team. To do so click on the Overflow Menu . At the top of the screen the user will see “Tools” with four associated actions: Edit, List/Tile, Settings, and Exit.

Tap on the Edit icon and 15 positions will be available to insert the needed plug-ins or Tools.
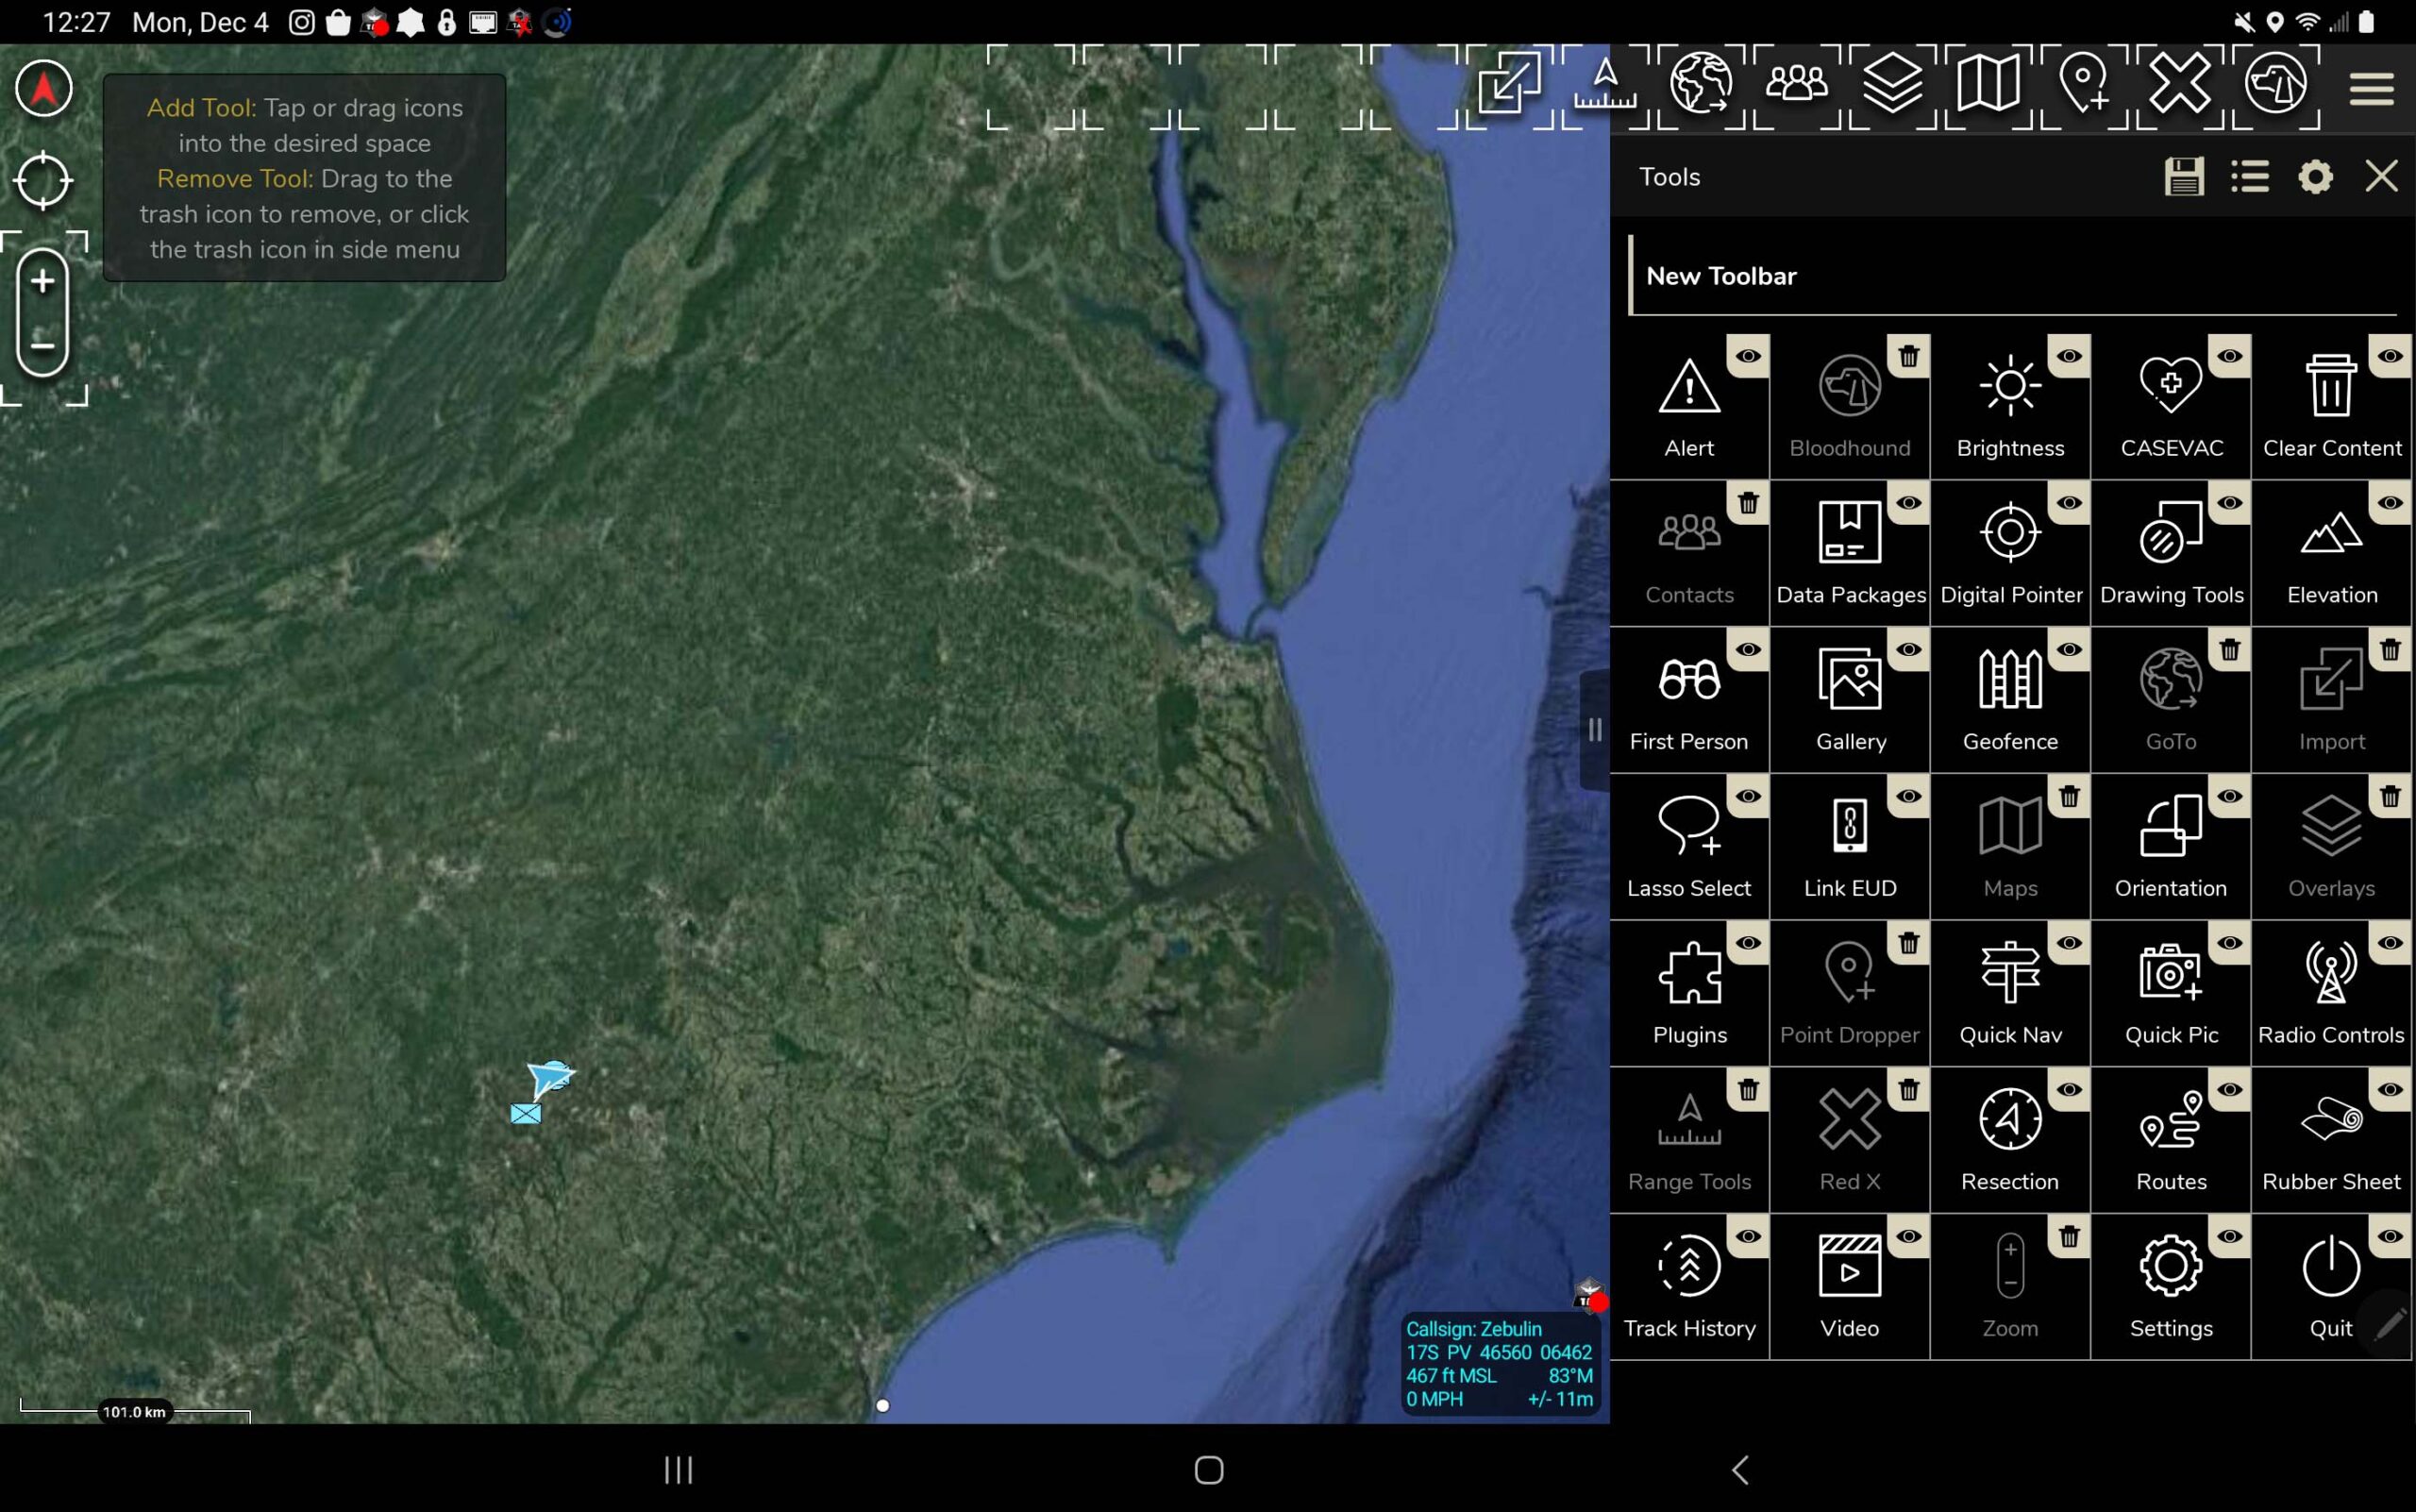
Fourteen slots are at the top of the ATAK screen, while one position is available where the manual Zoom in/out is located on the left of the screen (this only allows the user to hide the Zoom in/out tool). First step is to name the new Toolbar. By default, it is called “New Toolbar”. Click on the words and enter the new name. Next, drag and drop the needed icons into position on the ATAK screen. Once done, the user will have the option to toggle between the Default Toolbar and the newly created one. With two or more Toolbars available, the user will have the option to Export any of the created ones.
ATAK will create a zip file for the Toolbar, then give the user an option to share it with Contacts, Servers, 3rd party Apps or store the zip file in a new location. Now the user can share their customized Toolbar with all the members of their team.
Tough Stump University – ATAK Training
New users of ATAK can get a beginners boot camp through Tough Stump University. Our first course of instruction is TAK U Basic for Civ and Mil. A base line knowledge of how ATAK operates will give the user the tools to explore all the features, functions and plug-ins inside the TAK ecosystem.


Comments +